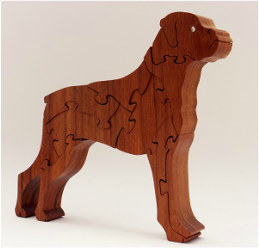
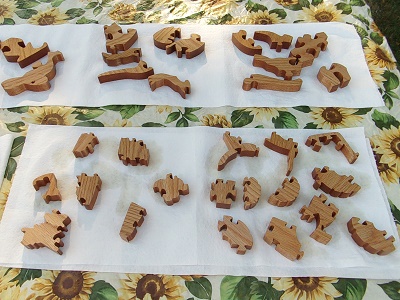
 After cutting the board down to a manageable size, it gets a sanding with 80, 100, 120 and 180 grit sand paper. I use a temporary spray adhesive to attach the paper pattern to the wood. Lots of testing in my workshop has shown 3M General Purpose 45 Spray Adhesive to be my favorite. I give the pattern a light spray, let it sit for a minute, then position it on the wood. Finally, I cover the paper with clear packing tape. The plastic tape stops the pattern from ripping as I cut and lubricates the saw blade. If the puzzle has any cut-outs or a jeweled eye, I pre-drill those spots. 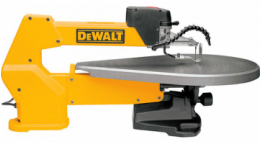 Once the prep work is done, I can start cutting the puzzle. I use this very nice DeWalt scroll saw fitted with a fine blade. (Blade choice is another piece of woodworking geekery that I'll save for its own blog post.) Cutting a puzzle takes between 30 and 90 minutes, depending on the number of pieces and the hardness of the wood. You can watch me work in the time lapse video below. Once all the pieces are cut out, I move to my sanding station. A sanding mop is the best way to smooth all the intricate curves in the pieces. I have the sanding mop loaded into a drill that is held down on the workbench with an array of clamps that looks like it came out of Frankenstein's lab. While not a pretty system, it works perfectly. As a last step, each piece gets a dip in a tung oil finish, mineral oil bath, or sprayed with shellac. Once the finish is dry I add any crystals or jewelry wire that the design requires and the puzzle is ready to go to a new home.
I hope you've enjoyed seeing the puzzle making process. Questions? Leave me a comment and I'll be happy to reply.
0 Comments
Your comment will be posted after it is approved.
Leave a Reply. |
AuthorBarbara Bitgood, Artisan owner of Holyoke Puzzles in Massachusetts. Archives
July 2023
Categories
All
|

 RSS Feed
